
Last Updated: February 2026 | Reading Time: 12 minutes
The backhand clear is the shot that separates recreational players from serious ones.
I know this because I was terrible at it for months. Every time my opponent hit to my backhand side at the back court, I’d either mishit the shuttle or hit a weak shot that gave them an easy putaway. My coach kept saying, “Your backhand clear is killing you. Fix that and your game improves immediately.”
He was right. Once I mastered the backhand clear, everything changed. I could defend the back court from either side. Opponents couldn’t exploit my weaker side anymore. Rallies lasted longer, which meant I had more chances to win the point.
The frustrating part? Learning the backhand clear took time. The technique is awkward if you’re not used to it. Your wrist angle is different from the forehand. The footwork is different. The entire body mechanics feel unnatural at first.
But here’s the good news: once you understand the mechanics and practice consistently, the backhand clear becomes one of your most reliable shots. Within 2-3 months of focused practice, most players can hit solid, consistent backhand clears.
In this comprehensive guide, I’ll teach you exactly how to execute a perfect backhand clear, step by step. You’ll understand the technique deeply—not just the mechanics, but why each element matters. You’ll learn common mistakes and how to fix them. Most importantly, you’ll have a practice plan to integrate backhand clears into your game.
What Is a Backhand Clear?
A backhand clear is a high, deep shot hit from the back court to the back court on your opponent’s side. It’s a defensive shot used to:
Push your opponent back into the back court when they’ve moved forward. Recover from a defensive position and reset the rally. Gain time to return to center court. Move your opponent around the court.
Key Characteristics:
High trajectory: The shuttle rises steeply and descends steeply. Deep landing: The shuttle should land within 1-2 feet of the back boundary line. Controlled power: Enough power to reach the back court consistently, not maximum power. Defensive nature: Primarily a recovery shot, not an attacking shot.
Difference From Forehand Clear:
The backhand clear is hit on your non-dominant side, using your non-dominant arm’s strength. This requires different technique and mechanics than the forehand clear.
Many players struggle with backhand clears because they try to hit them the same way as forehand clears. This doesn’t work. You need specific technique adjustments.
Why the Backhand Clear Matters
Before diving into technique, understand why this shot is critical:
Court Control
Your opponent thinks they can move forward because you struggle with backhand clears? They’ll do it repeatedly. Learning the backhand clear forces them to respect your back court from both sides.
Eliminating Weaknesses
Every player has a weaker side. If your backhand is weak, your opponent will target it relentlessly. A solid backhand clear eliminates this exploitable weakness.
Rally Extension
Backhand clears keep rallies going when you’re in defensive positions. Longer rallies give you chances to win points through patience rather than outright power.
Psychological Advantage
When your opponent realizes you can hit solid backhand clears, they stop exploiting that side. You instantly gain confidence because your weaker side is no longer a liability.
Match Performance
The difference between an intermediate player and an advanced player often comes down to backhand shot quality. Master the backhand clear and you’ve crossed an important threshold.
Grip: The Foundation
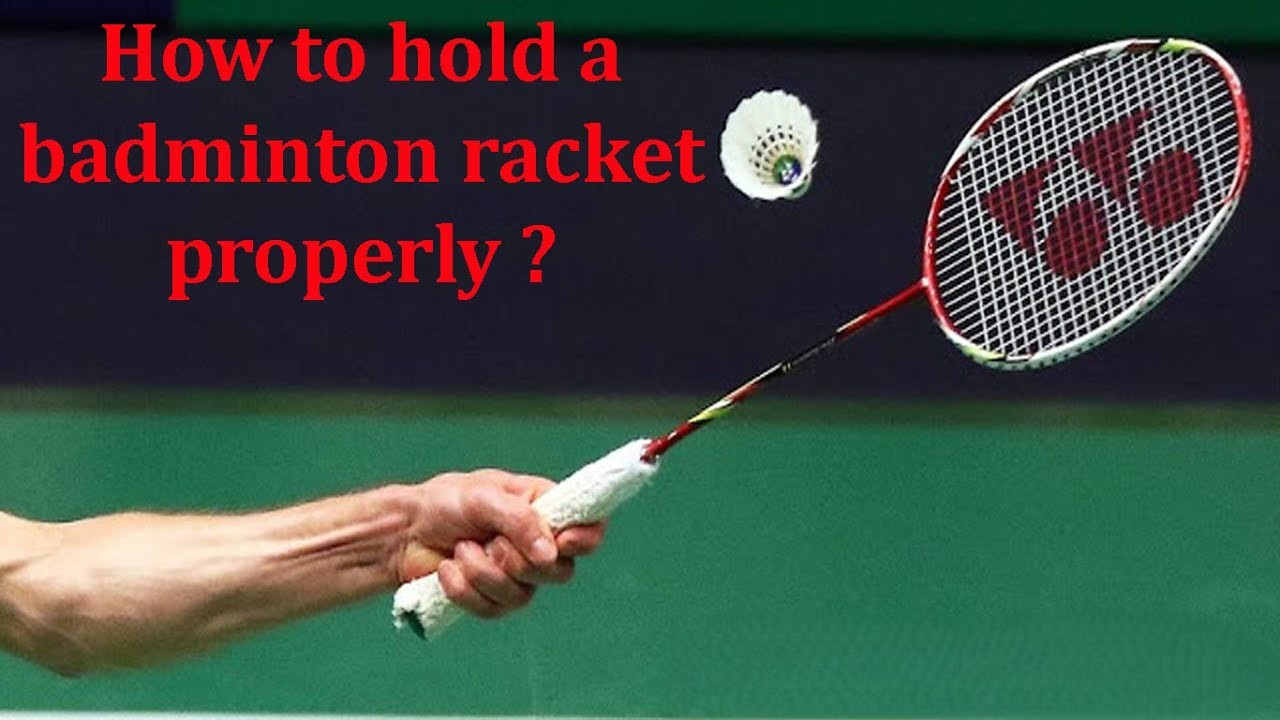
Everything starts with grip. Wrong grip on the backhand clear leads to problems throughout the stroke.
Correct Backhand Grip (Backhand Grip)
Hold the racket with your non-dominant hand:
Thumb Position: Diagonal across the back of the grip, with thumb pressing against the racket handle Fingers: Wrapped around the grip with fingers relaxed but firm Index Finger: Slightly separated from other fingers for control
Visual Check: Your thumb should form approximately a 45-degree angle with the handle.
This grip allows your thumb to generate power and control on the backhand stroke.
Comparison to Forehand Grip:
Forehand Grip: Palm faces the racket head more directly Backhand Grip: Hand rotates backward, thumb provides the power generation
The grip rotation is subtle but critical. Many beginners don’t rotate enough, making the backhand weak.
Testing Your Grip:
Hold the racket in backhand grip. Gently swing without a shuttle. Your thumb should feel engaged, not passive. The thumb is doing work in the backhand clear, not just resting on the handle.
If your thumb feels inactive, rotate your hand more.
Footwork: Getting Into Position
Poor footwork ruins even good stroke mechanics. You need to be in the right position to execute a proper backhand clear.
Starting Position
When you realize the shuttle is going to your backhand side:
- First movement: Small adjustment step toward the backhand side
- Then: Quick crossover step with your dominant leg crossing your non-dominant leg
- Finally: Position yourself so your non-dominant shoulder points toward the net
Key Positioning Elements:
Shoulders: Rotate so your non-dominant shoulder faces the net Feet: Position with non-dominant foot slightly forward Balance: Weight slightly forward on the balls of your feet Ready: Body coiled and ready to generate power
Timing the Footwork:
Move early. Professional players start their footwork the moment they realize the shuttle direction. Waiting until the last second forces rushed footwork.
Common Footwork Mistake:
Standing too close to the shuttle when you make contact. You need space to generate power. The shuttle should be slightly in front and to the side of your body, not directly above your head.
Proper Distance: About 12-18 inches from your body to the shuttle at contact point.
The Swing Mechanics: Step-by-Step
Now for the actual stroke. Break it into phases:
Phase 1: Preparation and Backswing
What Happens:
Your racket arm prepares to swing. The backswing builds the coiled energy you’ll release.
Mechanics:
- Begin with racket at chest height, in front of your body
- Rotate your shoulder, bringing your racket arm back and slightly up
- Your racket moves in a circular path, going back and up
- Keep your elbow relatively high (not dropping down)
- Your wrist stays cocked (bent back)
- Your non-racket arm helps balance your body
Visual Image:
Imagine drawing the racket back in a circle, like you’re starting to throw a ball. This circular motion is more natural than a straight back-and-forth motion.
Arm Position:
Racket arm: Brought back with elbow moderately high Non-racket arm: Extended for balance, helps with rotation Shoulders: Rotated significantly toward the backhand side
Wrist Position:
Critical: Your wrist is cocked back, not relaxed. This cocking stores energy that releases during the swing.
At the top of the backswing, your wrist should be bent back approximately 90 degrees.
Phase 2: The Forward Swing and Contact
What Happens:
You transition from backswing to forward swing, accelerating through to contact point.
Mechanics:
- Initiate the forward swing by driving your elbow forward
- Your wrist remains cocked initially, then snaps forward at the last moment
- Your shoulder continues rotating forward
- Your leg drive contributes power (if you have time for it)
- Contact the shuttle at the highest point you can reach
Contact Point:
Height: As high as possible (reaching up) Location: Slightly in front of your body Timing: At the peak of your upward arm motion
The higher your contact point, the more defensive and deep your clear will be. If you contact below your ideal height, your clear goes shorter.
Wrist Action:
The wrist snap is critical. After keeping your wrist cocked through the swing, you snap it forward just before contact. This snap generates significant power and control.
Think of it like cracking a whip. The coil of the wrist releases all at once at the moment of contact.
Follow-Through:
Your racket continues upward and across your body after contact. Don’t stop the motion abruptly. The natural follow-through continues the swing.
Direction: Racket moves up and slightly across your body Finish: Racket arm extended, momentum carrying through
Phase 3: Recovery and Return to Center
What Happens:
After the shot, you immediately prepare to move back to center court.
Mechanics:
- Complete your follow-through naturally
- Reset your feet by pushing off with the outside foot
- Move quickly back toward the center of the court
- Take small adjustment steps to find center position
- Get ready for the next shot
Timing:
Your opponent typically needs 1-2 seconds to reach your clear and return it. Use that time to recover position.
Don’t watch your shot. Instead, focus immediately on moving back to center court.
Common Mistakes and How to Fix Them
Mistake 1: Weak Power Generation
Problem: Your backhand clears don’t reach the back court consistently. They land mid-court, giving opponents easy attacking shots.
Cause: Usually improper wrist action or insufficient shoulder rotation.
How to Fix:
- Ensure your wrist is fully cocked in the backswing
- Snap your wrist forward more aggressively at contact
- Rotate your shoulder more completely
- Practice the motion slowly first, focusing on proper mechanics
- Gradually increase speed as mechanics improve
Practice Drill: Hit backhand clears to a specific target (near the back line). Count how many land within 2 feet of the back line. Aim for 7 out of 10 consistently.
Mistake 2: Poor Control and Inconsistency
Problem: Your backhand clears are inconsistent. Some go too short, some go too long, some miss the sideline.
Cause: Inconsistent contact point, poor footwork, or varying wrist action.
How to Fix:
- Focus on footwork first. Proper positioning is 70% of consistency.
- Establish a consistent contact point height
- Practice hitting 50 shots in a row, focusing only on contact point consistency
- Use a target line on the court (tape or rope) and try to land near it
Practice Drill: Have a partner feed you backhand shuttles. Hit 20 clears, aiming for a target 2 feet from the back line. Track accuracy. Work until you hit 15 out of 20 consistently.
Mistake 3: Contact Point Too Low
Problem: Your backhand clears don’t have much height. They come down quickly without the characteristic steep arc.
Cause: Reaching up insufficiently or contacting the shuttle too late in its descent.
How to Fix:
- Focus on reaching up higher. Stretch your arm fully.
- Move into position earlier so you’re not rushed
- Practice reaching movements without hitting
- Have a partner toss shuttles higher so you practice contacting at maximum height
Practice Drill: Toss a shuttle up from the back court and hit backhand clears attempting to contact at your maximum reach height. Focus on height before worrying about power.
Mistake 4: Incorrect Grip
Problem: Your backhand feels weak and uncontrolled. You can’t generate power despite proper mechanics.
Cause: Grip not rotated enough, or fingers holding too tight.
How to Fix:
- Check your grip. Your thumb should be diagonal across the back of the handle.
- Rotate your hand back more if needed
- Relax your grip slightly while maintaining firmness
- Feel your thumb engaging throughout the stroke
Practice Drill: Hold the backhand grip and practice slow-motion swings, focusing only on thumb engagement. Don’t hit shuttles yet, just get comfortable with the grip feeling.
Mistake 5: Rushing the Stroke
Problem: You’re constantly hitting late. Your backhand clears are always going short or into the net.
Cause: Moving too late, or hurrying your swing instead of smooth mechanics.
How to Fix:
- Move earlier. As soon as you see the shuttle coming to your backhand, start your footwork.
- Practice slow, deliberate swings at first
- Focus on smooth acceleration rather than jerky movements
- Don’t try to hit hard. Let the technique generate power.
Practice Drill: Have a partner feed you shuttles slowly. Practice hitting backhand clears with no time pressure. Focus on smooth mechanics.
Mistake 6: Poor Shoulder Rotation
Problem: Your shot feels weak despite good arm technique. You can’t generate power.
Cause: Insufficient shoulder rotation. Your shoulders aren’t driving the shot.
How to Fix:
- Rotate your shoulders significantly during backswing
- Feel your shoulders driving the forward swing
- Practice slow swings focusing only on shoulder rotation
- Video record yourself to see your shoulder movement
Practice Drill: Practice shoulder rotation without the racket. Swing your arms focusing on rotating your shoulders. Then add the racket and maintain that rotation.
Mistake 7: Arm Too Low During Swing
Problem: Your racket arm drops during the swing. You’re hitting more downward than forward.
Cause: Elbow drops instead of staying relatively high.
How to Fix:
- Keep your elbow up throughout the swing
- Don’t let gravity pull your elbow down
- Practice with your elbow deliberately high
- Video yourself to check elbow position
Practice Drill: Practice the swing motion with your elbow deliberately high. Exaggerate the position. Once comfortable, normalize to proper height.
Backhand Clear Variations
Once you master the basic backhand clear, learn variations:
Attacking Backhand Clear
Similar to a regular clear but with more aggressive power and flatter trajectory. You’re trying to push your opponent back quickly, not just maintaining a rally.
When to Use:
- Opponent is close to the net
- You have time to generate full power
- You want to transition from defense to neutral
Mechanics:
- More aggressive wrist snap
- Faster arm speed
- Slightly flatter trajectory
Backhand Clear With Deception
Hit the backhand clear with the same preparation as a drop shot or smash. Your opponent expects one shot and you deliver a clear.
When to Use:
- Keeping opponent guessing
- Creating space on court through surprise
- Disrupting opponent’s rhythm
Mechanics:
- Identical preparation to drop or smash
- Execute clear at last moment
- Element of surprise
Backhand Lift (Defensive Clear)
When forced very close to the net with a low shuttle, hit a backhand lift to get back to center court.
When to Use:
- Opponent has hit a tight net shot
- You’re forced forward and need to escape
- Emergency defensive situation
Mechanics:
- Much shorter swing
- Upward motion emphasis
- Control over power
Practice Drills for Backhand Clears
Drill 1: Target Practice
Setup:
- Mark a target area 2 feet from the back boundary line
- Place 20 shuttles on the baseline
Execution:
- Partner feeds you shuttles to the backhand side
- You hit backhand clears aiming for the target
- Count how many land in the target zone
- Goal: 15 out of 20
Progression:
- Week 1: 10 out of 20
- Week 2: 12 out of 20
- Week 3: 15 out of 20
Drill 2: Consistency Challenge
Setup:
- Partner feeds you shuttles continuously
Execution:
- Hit 50 consecutive backhand clears
- Focus on consistency, not power
- Track any poor shots
- Goal: At least 45 out of 50 solid clears
Benefits:
- Builds muscle memory
- Increases confidence
- Identifies remaining technique issues
Drill 3: Speed Progression
Setup:
- Partner feeds at increasing speeds
Execution:
- Start with slow feeds, hit smooth backhand clears
- Gradually increase feed speed
- Work up to match-pace feeds
- Hit 10 clears at each speed level
Benefits:
- Prepares you for match conditions
- Shows you can execute under pressure
- Identifies speed thresholds where you break down
Drill 4: Court Positioning Drill
Setup:
- Marks around the court to practice footwork
Execution:
- Partner calls which area you move to (front, back, left, right)
- You move there quickly, then hit a backhand clear
- Practice transitioning from any position to backhand clear
Benefits:
- Improves footwork efficiency
- Teaches you to hit quality shots even when rushed
- Match-realistic scenarios
Drill 5: Game-Realistic Rally
Setup:
- Play out rallies with partner
Execution:
- Start rally normally
- When shuttle goes to your backhand back court, hit a clear
- Continue the rally
- Play 5 games, focusing on backhand clear execution
Benefits:
- Applies technique to real game situations
- Pressure practice (shot matters for the rally)
- Shows how technique holds up in competition
Backhand Clear vs Other Backhand Shots
Understanding how the backhand clear fits into your overall backhand game:
Backhand Clear vs Backhand Drop
Clear: High, deep, defensive Drop: Low, short, net-focused
When to choose: Hit clear when opponent is at net. Hit drop when opponent is deep.
Backhand Clear vs Backhand Smash
Clear: Defensive, recovery shot Smash: Attacking, offensive shot
When to choose: Hit clear to move opponent. Hit smash when they’re vulnerable.
Backhand Clear vs Backhand Lift
Clear: Full court deep shot Lift: Short emergency recovery shot
When to choose: Hit clear from mid-court or back court. Hit lift when forced forward.
Mental Aspects: Building Confidence
Technical skill is half the battle. Mental confidence matters equally.
Building Backhand Clear Confidence:
Start with easy feeds. Don’t immediately practice against match-pace shots.
Celebrate small wins. Every good clear is progress.
Track improvement. Keep notes on consistency levels.
Play practice games. Use backhand clears in actual rallies.
Review video. See your improvement over weeks.
Common Confidence Issues:
Fear of missing: This causes jerky, tentative swings. Swing smoothly even if you might miss.
Impatience: Wanting to hit harder before technique is solid. Build mechanics first, speed later.
Comparison: Thinking your backhand should be as strong as your forehand immediately. Backhand takes longer to develop.
Training Progression: Building Your Backhand Clear
Weeks 1-2: Foundation
Goal: Understand and practice proper mechanics Focus: Grip, footwork, basic swing motion No score keeping yet Practice 20-30 minutes, 3x per week Expectation: Awkward and unnatural feeling
Weeks 3-4: Consistency
Goal: Hit 10-15 solid clears in a row Focus: Consistent contact point and mechanics Begin basic target practice 30-45 minutes practice, 3-4x per week Expectation: Starting to feel more natural
Weeks 5-6: Accuracy
Goal: 12 out of 20 clears land in target zone Focus: Power and placement together Increase practice complexity 45 minutes to 1 hour, 4x per week Expectation: Noticeable improvement
Weeks 7-8: Game Integration
Goal: Execute quality backhand clears in rally situations Focus: Technique under pressure Play practice games emphasizing backhand clears 1 hour practice, 4-5x per week Expectation: Confidence building in match play
Weeks 9-12: Mastery
Goal: Backhand clear is reliable weapon Focus: Consistency and variations Play full games using backhand clears strategically Ongoing regular practice Expectation: Backhand clear is no longer weakness
Video Analysis: Checking Your Form
Modern phones make video analysis accessible. Use it:
Record yourself hitting backhand clears from behind and to the side. Watch for:
- Wrist position at contact (should snap forward)
- Elbow height during swing (should stay relatively high)
- Shoulder rotation (should rotate significantly)
- Contact point height (as high as possible)
- Follow-through (smooth continuation)
- Footwork (proper positioning before swing)
Compare your video to professional players’ backhand clears. Look for differences. Focus on one correction at a time.
Frequently Asked Questions
Q: How long does it take to master the backhand clear? A: Basic competency takes 2-3 months of regular practice. True mastery takes 6-12 months. Consistent practice accelerates the timeline.
Q: Is the backhand clear harder than the forehand clear? A: Yes, for most players. The backhand requires different mechanics and usually less arm strength. But with practice, it becomes just as reliable.
Q: Should I practice backhand clears every session? A: Ideally yes. Include 15-20 minutes of backhand clear practice in every training session until it becomes reliable. Then maintain with 10 minutes per session.
Q: Can I use a different grip for backhand clears? A: You need a true backhand grip for proper mechanics. Don’t try to use a forehand grip—you won’t generate sufficient power.
Q: What if I’m left-handed? Does the technique change? A: No, the mechanics are identical. Your “backhand side” is different, but the technique is the same.
Q: How do I know if my backhand clear is improving? A: Track consistency (how many out of 10 are solid), depth (are they reaching the back court), and confidence in matches.
Q: Should I hit hard on backhand clears? A: Not at first. Focus on consistency and proper technique. Speed and power develop naturally once mechanics are solid.
Q: Can beginners learn backhand clears? A: Yes, but they should start with forehand clears first. Learn the basic clear on forehand, then transition to backhand.
Q: What if my opponent keeps hitting to my backhand? A: That’s actually good. It means you’re practicing your backhand clear constantly. Use it as an opportunity to build the shot.
Q: Is there a “lazy” version of the backhand clear I can use? A: Yes, hitting it flatter with less height. But it’s less effective defensively. Develop proper form while you’re learning.
Related Articles
Improve other aspects of your badminton game with these guides:
- How to Improve Your Badminton Smash: Tips for More Power and Accuracy
- Best Defensive Techniques in Badminton
- How to Master Net Play in Badminton
- Badminton Footwork Drills for Beginners: A Step-by-Step Guide
- Top Footwork Mistakes and How to Fix Them for Better Badminton Performance
Are you struggling with your backhand clear? Share your specific challenge in the comments and I’ll provide targeted advice!
Master the backhand clear and transform your game!
About This Guide: Written by experienced badminton coaches and players. Based on proven techniques and common learning progressions. Includes practical drills and troubleshooting advice.