
Beginners usually spend their first months focused on hitting the shuttle, and that is natural. But most missed shots at this level are footwork problems in disguise: you arrive late, off balance, or too close to the shuttle, and even a good swing goes wrong. The good news is that basic badminton footwork can be learned with a handful of simple drills, many of which you can do at home.
This guide teaches the core movement patterns in a logical order, with a drill for each and a four-week plan to put them together. It assumes no previous training. If you are completely new to the sport, our beginner’s guide to playing badminton covers grips, basic shots and rules first.
The Building Blocks of Badminton Footwork
Almost every movement on court is a combination of five elements:
- Ready stance: feet about shoulder-width apart, knees slightly bent, weight on the balls of the feet, racket up in front of you.
- Split step: a small hop as your opponent hits, landing on both feet so you can push off in any direction.
- Chassé (side step): a step-together pattern for moving sideways or diagonally backward without crossing your feet.
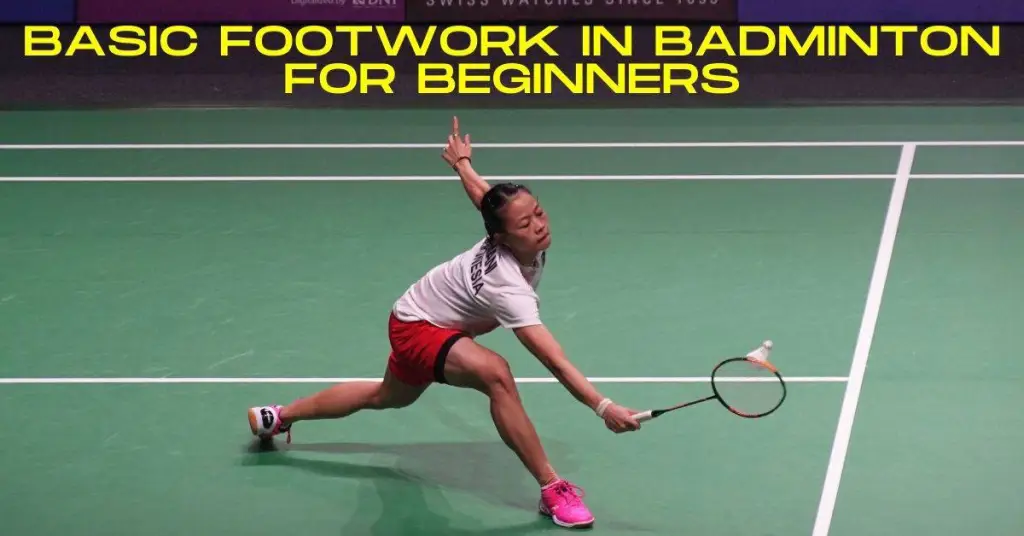
- Lunge: the long final step to the shuttle at the net or to the side, normally with your racket-side foot leading.
- Recovery: pushing back toward your base position, ready for the next shot.
The drills below train each element, then combine them.
Step-by-Step Footwork Drills
Drill 1: Ready stance and split step
Purpose: learn to be balanced and ready before each shot.
- Stand in the middle of the court in your ready stance.
- Have a partner across the net mime hitting a shot. Just before their racket meets the imaginary shuttle, make a small hop, about a few centimetres off the ground.
- Land softly on the balls of both feet, slightly wider than your starting stance, knees bent.
- Repeat 15 to 20 times. Without a partner, use a steady clap or a metronome app as your cue.
Check: you should feel springy, not flat-footed, when you land.
Drill 2: Side-to-side chassé
Purpose: move sideways quickly while staying square to the net.
- Start at base. Split step.
- Chassé toward the singles sideline: the leading foot steps out and the trailing foot follows without crossing.
- Reach with your racket as if playing a drive or block, then chassé back to base.
- Do 3 sets of 8 touches to each side, resting 45 seconds between sets.
Check: keep your hips low, as if sitting slightly on a stool, and your feet apart.
Drill 3: Front lunge and recovery
Purpose: reach the net with balance and get back quickly.
- From base, take one or two small steps toward the forehand net corner.
- Finish with a lunge on your racket-side foot (the right foot for a right-handed player). Land heel first and roll onto the whole foot, with your knee pointing in the same direction as your toes.
- Keep your back leg extended behind you and your trunk fairly upright.
- Push firmly off the front foot to return to base.
- Repeat 8 times to the forehand net, then 8 times to the backhand net.
Check: if you wobble at the bottom of the lunge, shorten the step until you can hold it for a second.
Drill 4: Moving to the rear court
Purpose: get behind the shuttle for clears and smashes.
- From base, turn your body sideways so your racket shoulder moves back.
- Use chassé steps backward toward the forehand rear corner.
- Mime an overhead shot, then move forward back to base.
- Do 8 repetitions, then practise moving to the backhand rear corner (round-the-head side) with the same pattern.
Check: avoid backpedalling straight backward facing the net; turn sideways first.
Drill 5: Six-corner shadow footwork
Purpose: combine everything into match-like movement.
- Picture six targets: two net corners, two mid-court sides, two rear corners.
- Split step at base, move to a corner, mime the right shot, and recover to base.
- Start with a fixed order (for example front-right, back-left, side-left, front-left, back-right, side-right).
- Work for 30 to 45 seconds, rest for 60 seconds, 4 to 5 rounds.
Tip: record yourself on a phone. Watching the video is one of the fastest ways to spot problems such as crossing your feet or not recovering.
Drill 6: Ladder or chalk-line footwork (home practice)
Purpose: foot speed and coordination with no court needed.
Use an agility ladder or draw one with tape or chalk. Practise two feet in each square, lateral in-and-out steps and quick side shuffles. Do 2 to 3 runs of each pattern for 20 to 30 seconds. Stay light on the balls of your feet.
Four-Week Beginner Footwork Plan
| Week | Focus | Drills (2 to 3 sessions per week, 15 to 20 minutes) |
|---|---|---|
| 1 | Stance and split step | Drill 1, Drill 2, ladder patterns |
| 2 | Front court | Drill 1, Drill 3, Drill 2 |
| 3 | Rear court | Drill 4, Drill 3, ladder patterns |
| 4 | Combining | Drill 5 in a fixed order, then random order called by a partner |
Begin each session with a short warm-up; our warm-up routine for badminton players works well before footwork practice.
How to Progress After the First Month
- Add randomness. Ask a partner to point to corners instead of following a fixed order.
- Add shuttles. Have a partner feed shuttles to different corners so you hit real shots after moving.
- Add speed gradually. Move faster only when your balance stays good.
- Add conditioning. Longer shadow rounds build stamina as well as technique.
When the basic patterns are solid, our guide to agility drills for faster badminton movement adds reactive and plyometric work.
What Good Beginner Footwork Looks Like
- You split step on every shot, not just some of them.
- You arrive at the shuttle balanced and with time to swing.
- Your feet do not cross when you move sideways.
- You push back toward base after every shot.
If you keep running into the same problems, our article on common footwork mistakes and how to fix them explains the causes and corrections.
Frequently Asked Questions
Can I practise badminton footwork at home?
Yes. Split steps, chassé steps, lunges, shadow footwork in a small space and ladder patterns all work at home.
How long does it take to improve footwork?
With two or three short sessions a week, most beginners notice better balance and court coverage within a month.
Which foot should I lunge with?
Most lunges are made with the racket-side foot leading, so right-handed players usually lunge with the right foot.