
The overhead backhand clear is one of the hardest strokes in badminton. You have to hit a high, deep shot from the rear backhand corner with your back partly turned to the net, using a short action and no help from a big body rotation. That is why opponents at every level aim at this corner. A player who can answer it with a reliable clear removes one of the most common targets in the game.
This guide covers the overhead backhand clear in detail: when to play it, the grip, the footwork into the corner, the stroke itself, common faults and a practice plan. It focuses on this one stroke; how it fits with other shots is covered in linked guides, such as the drop shot technique guide, since the backhand drop is often played from the same position.
What Is a Backhand Clear?
A backhand clear is a high, deep shot played on the non-racket side of the body, usually from the rear backhand corner, that travels to the back of the opponent’s court. It is mainly a defensive or neutral shot: it buys time to recover and keeps the opponent away from the net.
- Height: high enough that the opponent cannot intercept it at mid-court.
- Depth: ideally landing close to the opponent’s back boundary line.
- Direction: usually straight, which is the shorter and safer path; cross-court is longer and riskier.
Backhand Clear or Round-the-Head Shot?
When the shuttle goes to your rear backhand corner, you have two options: play an overhead backhand, or move further back and take the shuttle on the forehand over your head (a “round-the-head” shot). The round-the-head shot is stronger and more versatile when you have time. The backhand is needed when the shuttle is too deep or too far to your backhand side to get round it, or when you are late. Good players can play both and choose according to the situation, which is why learning the backhand clear is still essential.
The Grip
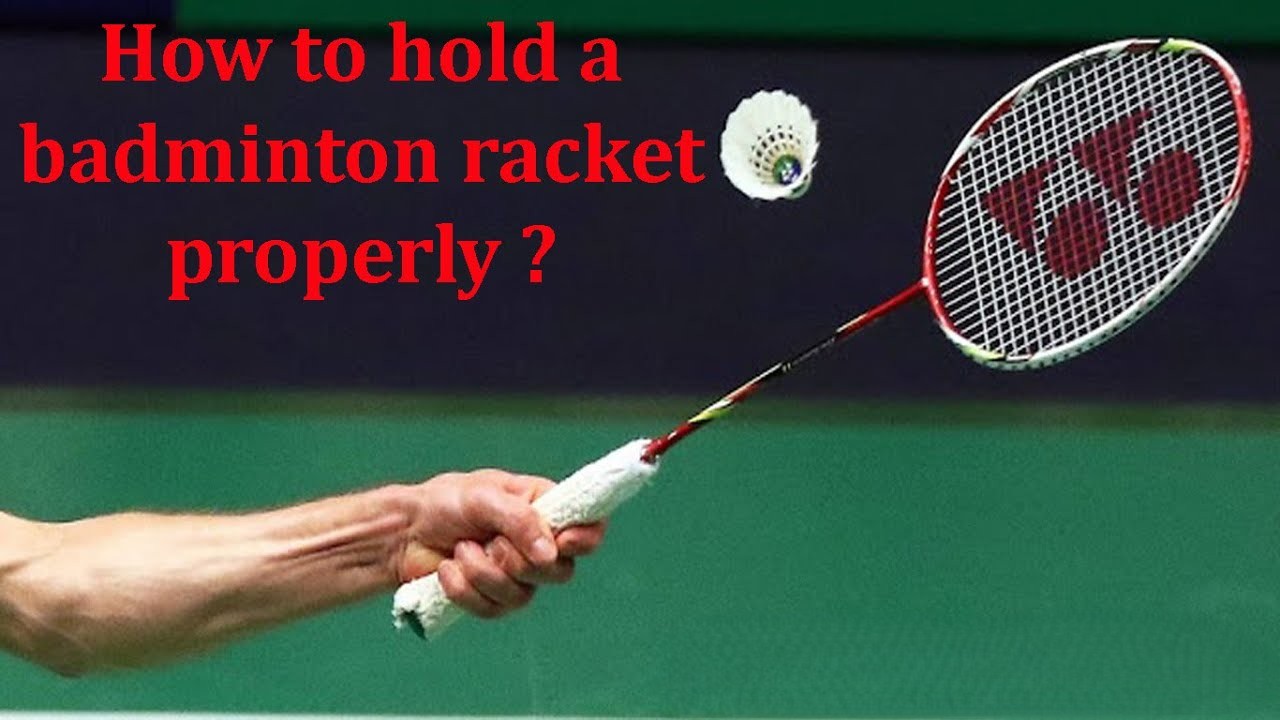
Use a backhand grip, held in your normal racket hand:
- From the forehand grip, rotate the racket slightly so the thumb can press on the wide back bevel of the handle (a “thumb grip”). Some players prefer the thumb on the ridge between the back and side bevels (a “bevel grip”) for overhead backhands.
- Hold the handle slightly lower than usual for extra leverage, with the fingers relaxed.
- At contact the thumb pushes and the fingers squeeze, adding speed in a very short movement.
The common error is staying in a forehand grip, which makes it almost impossible to get the racket face square to the shuttle. The guide to badminton grip types explains these grips with more detail.
Footwork Into the Rear Backhand Corner
The following is written for a right-handed player; left-handers reverse it.
- Split step at base as the opponent hits.
- Pivot on the left foot and turn your body so your back starts to face the net.
- Move into the corner with a chassé or running steps, finishing with a long step of the right (racket) foot toward the corner.
- Arrive with the right foot pointing roughly toward the back corner or sideline, the right shoulder toward the shuttle, and the body weight on the right foot.
Arriving early matters more for this shot than almost any other. If you arrive late, the shuttle is behind you and the clear will fall short. Footwork patterns into each corner are practised in the footwork drills for beginners guide.
The Stroke, Phase by Phase
Phase 1: Preparation
- Bring the racket across your body toward your left shoulder, racket head pointing down.
- Raise the elbow so it points up toward the shuttle. The forearm should be roughly level or angled slightly down from the elbow.
- Keep the grip relaxed and your eyes on the shuttle.
Phase 2: The Hitting Action
- Lead with the elbow: lift the elbow up toward the shuttle.
- Rotate the forearm: as the elbow extends, the forearm rotates outward (supination), swinging the racket head up and through. This rotation, not a flick of the wrist, is the main source of power.
- Thumb push and finger squeeze at contact add the final speed.
- Contact the shuttle high, with the arm close to full extension, above and slightly toward the outside of the racket shoulder, before it drops behind you.
- Racket face: angled slightly upward to send the shuttle high and deep.
Phase 3: Short Follow-Through
Unlike the forehand clear, the backhand clear usually has a short, abrupt finish: the racket stops soon after contact. This “tap” action keeps the stroke compact and helps you recover faster. Trying to swing through in a big arc usually slows the racket head before contact.
Phase 4: Recovery
- Push off the right foot and turn back to face the net.
- Return to base with quick steps, watching the opponent’s reply.
- A good clear gives you time; a short one gives the opponent a smash, so recover immediately either way.
Why the Backhand Clear Is Hard
- Little body rotation is available, because your back is partly to the net.
- The power comes from a small, fast movement of the elbow, forearm and thumb, which takes time to coordinate.
- Timing is tight: the contact window is small and late contact costs a lot of distance.
- Visibility is limited, because you cannot see the opponent while you hit.
Understanding this helps you practise the right things: timing and forearm speed, not arm strength.
Common Mistakes and How to Fix Them
1. Clears Falling Short
Cause: late contact, low contact or a big, slow swing.
Fix: arrive earlier, contact higher and use a short, fast elbow-and-forearm action. Practise aiming high first; length follows height.
2. Using the Forehand Grip
Cause: not changing grip in time.
Fix: practise the grip change during shadow footwork until it happens automatically as you turn.
3. Dropping the Elbow
Cause: preparing with the elbow low by the body.
Fix: in preparation, point the elbow at the shuttle. Video yourself from the side to check.
4. Flicking the Wrist
Cause: trying to generate power from the wrist alone.
Fix: focus on forearm rotation and the thumb push. The wrist stays relaxed and follows.
5. Contact Behind the Body
Cause: slow footwork or turning too far.
Fix: move earlier and take the shuttle beside or slightly ahead of the racket shoulder.
6. Wrong Last Step
Cause: finishing on the left foot, which leaves you off balance.
Fix: the final step into the corner is the racket foot.
7. Slow Recovery
Cause: watching the shot or following through too far.
Fix: keep the follow-through short and turn back to the net immediately.
Footwork errors cause many of these faults. The guide to common footwork mistakes covers the movement side in more detail.
Related Backhand Shots From the Same Corner
| Shot | Trajectory | When to use |
|---|---|---|
| Backhand clear | High and deep | To buy time and push the opponent back |
| Backhand drop | Down and short, landing near the net | When the opponent is deep or expects a clear |
| Backhand smash | Down and fast, usually less powerful than a forehand smash | Occasionally, as a surprise when the shuttle is not too deep |
| Backhand drive | Flat, from mid-court | When the shuttle is lower, beside the body |
Being able to play the drop as well as the clear from the same preparation stops the opponent moving early. Controlling direction from this awkward position relies on the same face-angle principles explained in the guide on controlling shuttle direction.
Drills for the Backhand Clear
1. Shadow Footwork and Swing
Without a shuttle, move from base into the rear backhand corner, change grip, swing and recover. Three sets of ten. Check the last step is the racket foot.
2. Static Hand Feed
Stand in the corner already turned. A partner throws or hits shuttles high to your backhand. Focus only on contact height and forearm rotation. Start with height; worry about length later.
3. Target Depth
Mark a zone in the last metre of the opponent’s court. From racket feeds, hit 20 backhand clears and count how many land in it. Track your score over several weeks.
4. Movement Plus Clear
Start at base. The feeder clears to your rear backhand; you move, play the backhand clear and recover. Add a front-court touch between each repetition to make it more realistic.
5. Choice Drill
The feeder sends shuttles to the rear backhand at different depths. Play the round-the-head shot when you can get there and the backhand clear when you cannot. This trains the decision as well as the stroke.
6. Conditioned Games
Play practice games where your opponent must aim most shots at your rear backhand. It is the fastest way to find out how your clear holds up under pressure.
A Simple Practice Plan
- Stage 1: grip and shape. Shadow swings and hand feeds; aim for clean contact and height.
- Stage 2: consistency. Racket feeds from a static position; aim for repeated clears that reach the rear third of the court.
- Stage 3: movement. Add footwork from base and recovery after each shot.
- Stage 4: pressure. Faster feeds, choice drills and conditioned games.
Move on to the next stage only when the current one feels reliable. Short, regular sessions of 10 to 15 minutes are more effective than occasional long ones.
Strength and Conditioning
The backhand clear relies on a fast, coordinated forearm rather than raw strength, but forearm and shoulder conditioning help. Useful exercises include light wrist and forearm rotation work with a small weight or band, rotator-cuff band exercises and shadow swings with a racket head cover for extra resistance. Avoid heavy loading that changes your technique. A broader programme is in the guide to strength training exercises for badminton players.
Frequently Asked Questions
Is the backhand clear harder than the forehand clear?
Yes, for most players. There is less body rotation available and the timing window is smaller, so it usually takes longer to learn.
Should I always use the round-the-head shot instead?
Use it when you have time to get behind the shuttle. When the shuttle is very deep or far to your backhand side, the backhand clear is the better option.
Why do my backhand clears go only to mid-court?
Most often because of late or low contact and a slow, long swing. Move earlier, contact higher and use a short, fast forearm action.
Does the technique change for left-handers?
The mechanics are the same, mirrored. Left-handers’ rear backhand corner is on the opposite side of the court.
Should beginners learn the backhand clear?
Yes, after the forehand overhead clear is reasonably consistent. Start with the grip and preparation so good habits form early.