
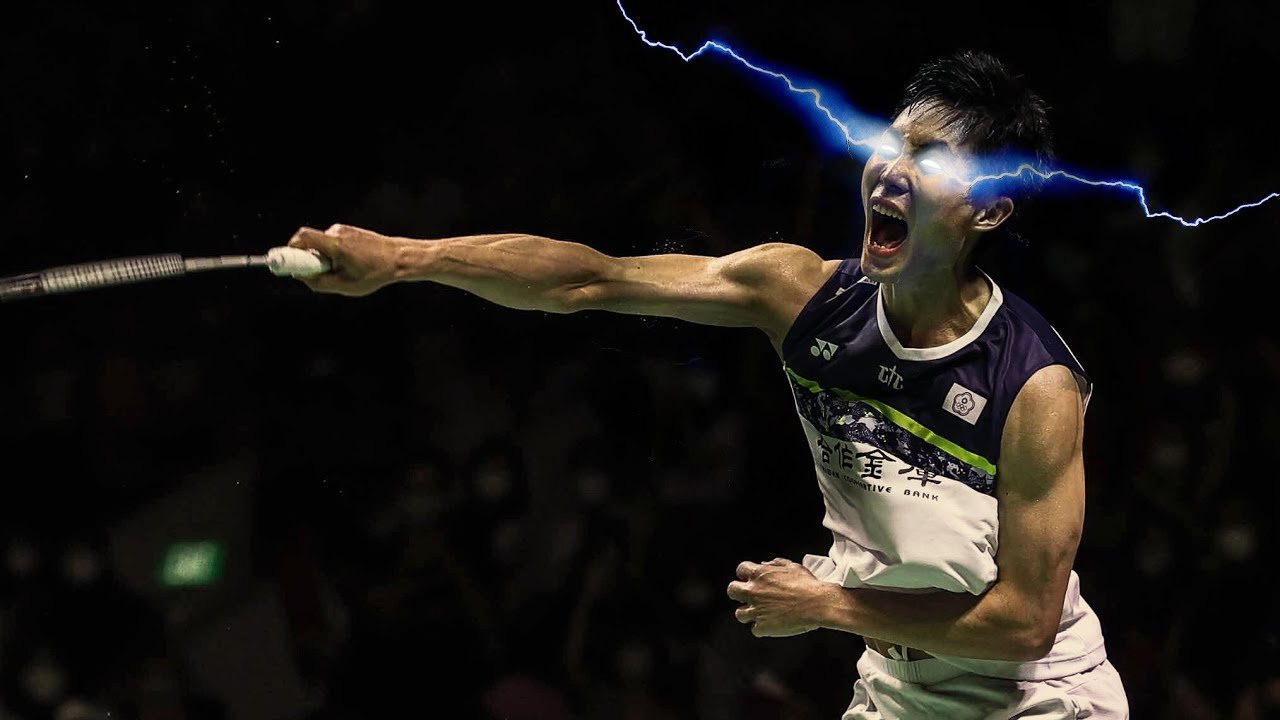
The jump smash is the most visually impressive shot in badminton. When executed properly, it’s also one of the most destructive.
I’ll never forget the first time I saw a proper jump smash in person. My club’s top player was defending a rally at the back court when his opponent hit a high clear. Instead of stepping back, he exploded upward in a jump, meeting the shuttle at maximum height, and crushed it downward with such force that his opponent couldn’t even react.
Point over in a split second.
I spent the next month trying to replicate that shot. My first attempts were embarrassing—I jumped too early, made contact at the wrong point, or landed awkwardly. But I kept practicing, and eventually, my jump smash became one of my most effective shots.
The jump smash separates intermediate players from advanced players. It’s not a beginner shot. You need solid fundamentals first. But once you master the regular smash, adding the jump element transforms it into a genuinely threatening weapon.
In this guide, I’ll teach you exactly how to execute a jump smash that actually works. You’ll learn the timing, the footwork, the mechanics, and how to avoid common mistakes. Most importantly, you’ll understand when to use the jump smash and when to stick with the regular smash.
What Is a Jump Smash?
A jump smash is an overhead attacking shot where you leap into the air to meet the shuttle at maximum height, then strike it downward with full power.
Key Characteristics:
Maximum Height: You contact the shuttle at the highest point possible by jumping. Explosive Power: The downward trajectory creates maximum force and speed. Aggressive Intent: It’s purely an attacking shot, not defensive. Difficult to Return: Most opponents can’t defend against a quality jump smash.
Difference From Regular Smash:
Regular Smash: Hit from the ground, contact below your full reach height Jump Smash: Hit while airborne, contact at maximum possible height
The jump smash provides a higher contact point, which creates steeper angles and harder-to-defend shots.
When to Use the Jump Smash
Not every smash opportunity calls for a jump smash. Understanding when to jump is crucial.
Use Jump Smash When:
Opponent hits a high clear: The shuttle reaches sufficient height for you to jump effectively.
You’re positioned at the back court: You have space to jump safely.
You have time to prepare: You’re not rushed or off-balance.
You want maximum power and angle: The situation demands an aggressive putaway.
Opponent is vulnerable: They’re out of position or moving slowly.
Don’t Jump When:
You’re at the net or mid-court: Not enough space or height to jump safely.
You’re rushed or off-balance: Can’t execute proper technique.
The shuttle is low: Jumping won’t give you additional height advantage.
You’re already winning the rally: A regular smash might be safer.
You’re tired: A jump smash is physically demanding.
Footwork and Positioning
Proper footwork determines whether your jump smash succeeds or fails.
Early Movement
The moment your opponent hits a high clear, you need to move.
Process:
- Recognize the trajectory is high
- Move backward quickly toward the back court
- Position yourself directly under where the shuttle will peak
- Don’t wait for the shuttle to start descending
Common Mistake: Many players wait for the shuttle to descend before moving. By then, they’re too deep or out of position.
Pro Approach: Move immediately when you see the high trajectory. Get into position well before the shuttle reaches its peak.
Optimal Positioning
Where to Stand:
Position yourself so the shuttle will be slightly in front of your body when you jump.
Your feet should be shoulder-width apart, ready to spring upward.
You should be roughly 2-3 feet from the back boundary line.
Why This Matters:
Standing too close to the net means you won’t have space to jump backward.
Standing too far back means you jump into the net area unnecessarily.
Positioning under the shuttle’s peak gives you the best timing.
The Approach Step
As the shuttle approaches its peak:
- Take a small adjustment step if needed
- Load your weight on the balls of your feet
- Keep knees slightly bent, ready to spring
- Arms relaxed but ready for the jump motion
Timing: The approach step should be timed so you’re ready to spring just as the shuttle reaches its peak.
The Jump Mechanics
This is where technique becomes critical. Poor jumping technique wastes effort and creates poor contact.
The Takeoff
What Happens:
You explosively push off the ground using your leg muscles to launch yourself upward.
Mechanics:
- Bend your knees to load power (like preparing for a vertical jump)
- Explosively extend your legs, pushing through the balls of your feet
- Simultaneously swing your non-racket arm upward for momentum
- Your racket arm stays relatively ready
Arm Usage: Your non-racket arm swinging up actually helps your vertical jump. Don’t ignore this.
Common Mistake: Beginners often don’t bend their knees enough. Deeper knee bend = higher jump.
At the Peak of the Jump
What Happens:
You’ve reached maximum height and are about to make contact.
Mechanics:
- Your racket arm is raised, ready to strike
- Your body is extended, reaching upward
- You’re at or near the peak of your jump
- Contact is imminent
Critical Point: Timing is everything. You must contact the shuttle right at or just before you reach maximum height. Contacting while descending wastes power.
The Striking Motion
What Happens:
You strike the shuttle with full power using a downward motion.
Mechanics:
- Your shoulder rotates forward
- Your elbow extends, driving toward the shuttle
- Your wrist cocks, then snaps forward at contact
- The racket accelerates through the contact point
- Full body weight transfers into the shot
Power Sources:
Leg Drive: From the jump Rotation: Shoulder and torso rotation Arm Speed: Racket arm acceleration Wrist Snap: Generates additional speed
All four combine for maximum power.
The Follow-Through and Landing
What Happens:
After striking, you complete the motion and return to the ground safely.
Mechanics:
- Racket continues through with natural momentum
- Your body momentum carries you forward slightly
- You land on both feet, balanced
- Immediately prepare to move for the next shot
Landing Safety:
Land softly, not hard-footed. Bend your knees on landing to absorb impact.
Land on both feet simultaneously, not one foot first (reduces injury risk).
Balance should be maintained throughout landing.
Common Mistake: Poor landings cause injuries. This is serious. Practice safe landings.
Power Generation Tips
Not all jump smashes have equal power. Here’s how to maximize your smash power:
Explosive Leg Drive
The power starts in your legs. A weak jump = weak smash.
Train leg strength with squats, lunges, and plyometrics.
Jump as high as possible to reach the peak of your jump ability.
Load your knees more deeply for more power.
Full Body Rotation
Your entire body should rotate into the smash, not just your arm.
Shoulders rotate fully toward the target.
Core muscles engage, driving rotation.
This rotation adds significant power to the shot.
Wrist Snap
At contact, snap your wrist forward explosively.
This final motion adds surprising power to the smash.
Don’t slow your wrist action—snap it quickly.
Racket Head Speed
The faster your racket head travels, the faster the shuttle.
Accelerate continuously from start of swing through contact.
Don’t decelerate before contact.
Contact Point
Contact at the highest point, not on the way down.
Higher contact = steeper angle and more control.
Lower contact = less effective angle.
Common Mistakes and How to Fix Them
Mistake 1: Jumping Too Early or Too Late
Problem: Your timing is off. You’re at peak height before the shuttle arrives, or descending when it arrives.
Cause: Misjudging the shuttle’s arc and timing.
Fix:
- Practice judging the shuttle’s trajectory
- Move into position and wait, don’t jump immediately
- Timing comes with practice
- Video yourself to see your timing
Mistake 2: Poor Balance in the Air
Problem: You’re off-balance during the smash, leading to poor contact or awkward landing.
Cause: Poor footwork and positioning before the jump.
Fix:
- Improve your ground positioning first
- Ensure you’re under the shuttle, not off to the side
- Practice jumping without hitting—just jumping for height
- Focus on being balanced at peak height
Mistake 3: Contacting Below Peak Height
Problem: You contact the shuttle after you’ve started descending, reducing power and angle.
Cause: Jumping too early or not timing contact at peak height.
Fix:
- Practice timing contact at the highest point
- Don’t jump until you’re certain of the timing
- Watch professional players—they contact near peak height
- Practice drill: jump and contact without a shuttle, focusing on high contact point
Mistake 4: Landing Incorrectly
Problem: You land hard on one foot or lose balance, risking injury.
Cause: Poor landing technique or landing while still moving forward.
Fix:
- Practice landing on both feet simultaneously
- Bend your knees on landing to absorb impact
- Don’t land hard-footed—land softly
- Land balanced, ready to move for next shot
Mistake 5: Not Generating Enough Power
Problem: Your jump smash isn’t significantly more powerful than your regular smash.
Cause: Weak leg drive, poor timing, or insufficient body rotation.
Fix:
- Strengthen your legs with training
- Focus on explosive knee extension during jump
- Rotate your shoulders fully
- Snap your wrist at contact
- Ensure you’re contacting at maximum height
Mistake 6: Insufficient Preparation Time
Problem: You attempt jump smashes in situations where you don’t have time to prepare properly.
Cause: Not recognizing when conditions are suitable for jump smashes.
Fix:
- Only use jump smash when you have clear time to prepare
- Use regular smash when rushed
- Develop better court positioning to create prep time
- Recognize when opponents hit high clears vs flat shots
Practice Drills for Jump Smash
Drill 1: Jump Height Training
Goal: Improve your vertical jump
Execution:
- Stand in the back court
- Jump as high as possible, touching a target (wall, tape, etc.)
- Do 10 jumps, resting between each
- Repeat 3 sets
- Track height over weeks
Progression:
- Increase height target each week
- Increase number of jumps per set
- Decrease rest between jumps
Drill 2: Jump Smash at Net Posts
Goal: Practice jump smash in controlled environment
Execution:
- Have partner drop shuttles near back court
- Practice jump and smash motion
- Focus on timing and contact point
- Do 20 smashes per session
Progression:
- Increase feed height
- Increase feed distance
- Add movement before the feed
Drill 3: High Clear and Smash
Goal: Practice realistic jump smash scenario
Execution:
- Partner hits high clear
- You hit jump smash
- Partner hits another high clear
- Continue rally, practicing jump smashes
- Play 5-10 sequences per session
Benefits:
- Game-realistic scenario
- Develops rhythm and timing
- Tests technique under pressure
Drill 4: Timed Jump Smash
Goal: Develop consistency under time pressure
Execution:
- Partner feeds high clears at regular intervals
- You hit jump smashes
- Track consistency
- Goal: 8 out of 10 successful smashes
Progression:
- Increase feed speed
- Vary shuttle height
- Shorten rest between feeds
Drill 5: Angle and Placement
Goal: Develop accuracy with jump smashes
Execution:
- Partner feeds high clears
- You aim for specific areas of court
- Attempt cross-court angles, straight smashes, etc.
- Track placement accuracy
Benefits:
- Not all smashes need to be straight down
- Angled smashes can be more effective
- Develops tactical awareness
Safety Considerations
Jump smashes are athletically demanding and carry injury risk.
Injury Prevention:
Warm up properly before attempting jump smashes.
Strengthen your legs with regular training.
Practice proper landing technique consistently.
Don’t attempt jump smashes when fatigued.
Know your physical limits and don’t exceed them.
Common Injuries:
Ankle sprains from awkward landings.
Knee stress from repetitive jumping.
Shoulder strain from powerful motion.
Lower back strain from rotation and power generation.
If You Feel Pain:
Stop immediately. Don’t push through pain.
Ice the area if it swells.
Rest before resuming practice.
See a physiotherapist if pain persists.
Injury prevention is more important than practice gains.
Combining Jump Smash With Other Shots
The jump smash is most effective when part of a varied game.
Smash Progression:
High Clear: Opponent hits high clear
Regular Smash: Hit a regular smash (not jumping)
Jump Smash: Opponent adjusts, hits another high clear, you jump smash
By varying which smashes you jump on, you keep your opponent guessing.
Tactical Usage:
Don’t jump smash every high clear. Mix it up.
Sometimes use regular smash to conserve energy.
Jump smash when you have optimal conditions.
Regular smash when time or space is limited.
This variation keeps your play unpredictable.
Training Progression
Weeks 1-2: Basics
Focus on jumping height without hitting. Practice jump mechanics. No shuttle contact yet. Goal: Feel comfortable jumping.
Weeks 3-4: Introduction
Practice jump smash with partner feeding high shuttles. Focus on timing contact at peak height. Don’t worry about power yet, just technique. Goal: Solid contact, even if power is weak.
Weeks 5-6: Power Development
Increase intensity of jump smashes. Add power to the motion. Focus on body rotation and wrist snap. Goal: Noticeable power in your smashes.
Weeks 7-8: Game Integration
Use jump smashes in practice games. Vary when you jump versus regular smash. Develop tactical sense for when to use. Goal: Confident usage in matches.
Weeks 9-12: Refinement
Polish technique further. Increase consistency. Develop accuracy and placement. Goal: Jump smash is reliable weapon.
Frequently Asked Questions
Q: Do I need to be very tall to execute jump smash effectively? A: No. A lower player who jumps well can reach higher than a tall player who doesn’t jump. Jump height matters more than base height.
Q: How much higher do I need to jump for jump smash to be worth it? A: Even a 1-foot higher contact point gives you better angles and power. Meaningful jump = meaningful improvement.
Q: Is jump smash risky? What if I miss? A: Yes, it’s higher risk. But high risk brings high reward. Use it strategically, not in every opportunity.
Q: Can I practice jump smash alone? A: Partially. You can practice jumping and the motion. But you need partners to feed you shuttles for realistic practice.
Q: Will jump smash tire me out faster? A: Yes, jumping is more physically demanding than regular shots. Use it strategically, not constantly.
Q: At what skill level should I learn jump smash? A: After solid intermediate level. You should have strong regular smash first.
Q: Can I use jump smash from mid-court? A: Generally no. You need space to jump safely. Back court or near back court is best.
Q: What footwear is best for jump smash? A: Proper badminton shoes with ankle support. Good grip is critical for safe landing.
Related Articles
Improve your attacking game with these guides:
- How to Improve Your Badminton Smash: Tips for More Power and Accuracy
- Badminton Drop Shot Technique: Master the Perfect Drop
- How to Master Net Play in Badminton
- Badminton Footwork Drills for Beginners: A Step-by-Step Guide
- Top Footwork Mistakes and How to Fix Them for Better Badminton Performance
Have you tried jump smash before? Share your experience or questions in the comments!
Jump high, smash hard!
About This Guide: Based on techniques used by advanced and professional players. Includes safety considerations for injury prevention.