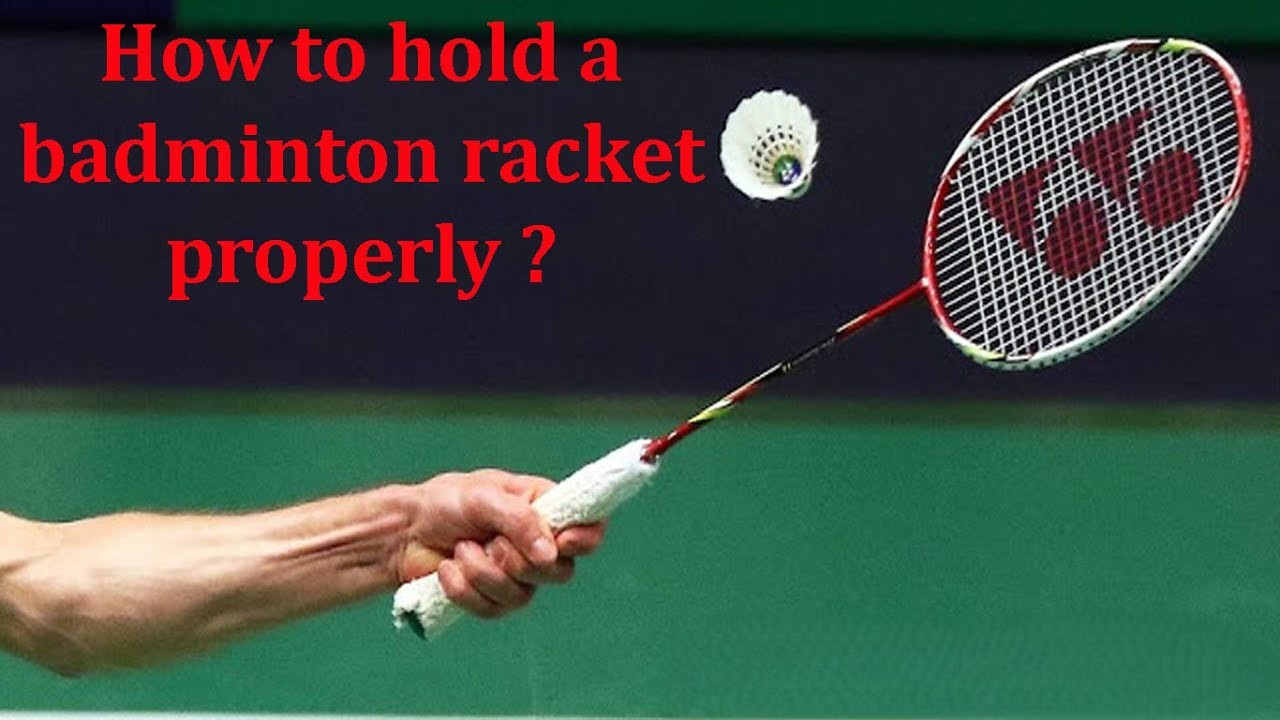

Last Updated: February 2026 | Reading Time: 13 minutes
I spent $25 getting my badminton racket restrung at the local club. The pro took about 15 minutes. As I watched him work, I thought: “This can’t be that hard. Why am I paying for this?”
Six months later, I bought a stringing machine and learned to do it myself. My first attempt was a disaster—uneven tension, a broken string, and a racket that felt worse than before. But I kept practicing.
Today, I’ve strung dozens of rackets. Not only do I save money, but I also have complete control over my equipment. When my strings lose tension, I restring immediately instead of waiting days or weeks. When I want to experiment with different string types or tensions, I can do it whenever I want.
The truth? Stringing a badminton racket is learnable. It requires some basic tools and patience, but it’s absolutely achievable at home. In this comprehensive guide, I’ll teach you everything you need to know—from selecting equipment to completing your first professional-quality string job.
Do You Actually Need to String Your Own Racket?
Before investing in tools, let’s be honest about whether DIY stringing makes sense for you.
You Should DIY String If:
You play regularly (3+ times per week) and restring frequently. The investment pays for itself within 3-4 restrings.
You want complete control over string type, tension, and timing. Professional shops have limited flexibility.
You’re competitive and need custom tension that matches your playing style. DIY allows experimentation.
You live far from professional stringing services. Cost and convenience favor DIY.
You enjoy tinkering and learning new skills. The learning process itself is rewarding.
Professional Stringing Makes More Sense If:
You play casually (1-2 times per week). You won’t restring often enough to justify equipment costs.
You have quality stringing services nearby. Convenience and expert quality might outweigh cost savings.
You don’t want to invest in tools or learn a new skill. Time and effort matter more than money.
You’re a complete beginner. Professional stringing while learning ensures your racket works properly.
The Math:
Professional stringing cost: $15-25 per racket
Home stringing cost per racket: $3-8 (just materials)
Stringing machine cost: $200-500 (one-time investment)
Break-even point: 10-20 restrings depending on your costs
If you’ll restring more than 15 times in your badminton career, DIY pays for itself.
Tools and Materials You’ll Need
Essential Tools
Stringing Machine
This is the core investment. Three main types exist:
Manual Machines:
- Price: $150-300
- Operation: Hand-crank tension adjustment
- Best for: Beginners and casual stringers
- Drawback: Physically tiring, less precision
Pneumatic/Air-Pressure Machines:
- Price: $300-700
- Operation: Air compressor adjusts tension
- Best for: Regular stringers
- Advantage: Faster, more consistent, less physical effort
Electronic Machines:
- Price: $500-2000+
- Operation: Digital precision control
- Best for: Serious hobbyists and semi-professionals
- Advantage: Maximum consistency and speed
Recommendation for beginners: Start with a manual machine. Learn the fundamentals. Upgrade later if you continue stringing regularly.
Badminton-Specific Clamps
Hold the racket frame stable during stringing. Most stringing machines include clamps, but you may need badminton-specific adapters.
Cost: $20-50 if purchased separately
Stringing Tools
Needle/Spacer: Guides string through grommets
- Price: $5-15
String Cutter: Cleanly cuts string
- Price: $3-8
Grommet Tool: Protects and maintains grommets
- Price: $10-20
Tension Meter: Measures actual string tension
- Price: $50-150 (optional but helpful)
Total Tool Investment:
Basic setup: $150-300 Intermediate setup: $300-500 Professional setup: $500-2000+
For first-time stringers, $200-300 gets you started with a manual machine and basic tools.
String Materials
String Type Selection
Badminton strings come in different gauges and materials. Common options:
Synthetic Nylon (Most Popular):
- Price: $5-15 per 10-meter set
- Durability: Good
- Feel: Crisp and responsive
- Best for: Most players
Natural Gut:
- Price: $20-40+ per set
- Durability: Excellent when protected
- Feel: Superior touch and comfort
- Best for: Professional and advanced players
High-Performance Synthetic:
- Price: $10-20 per set
- Durability: Very good
- Feel: Excellent balance
- Best for: Serious intermediates
Recommendation for beginners: Buy mid-range nylon string ($8-12 per set). Once you restring regularly, experiment with different types.
String Gauge:
Typical badminton strings are 20, 21, or 22 gauge (thinner is lower number).
Thinner strings (20): More power, less durable Thicker strings (22): More durable, less power
Most players use 21-gauge as the compromise.
Quantity Needed:
A full racket requires approximately 20-22 meters of string for both mains and crosses.
Most strings sold in 10-meter sets, so buy two sets per racket.
Cost per stringing: $10-30 depending on string quality
Understanding String Tension
This is crucial. Tension affects how your racket plays, and it changes over time.
How Tension Works
Tighter strings:
- More control and accuracy
- Less power (you provide the power)
- Better for defensive play
- Requires good technique
- Strings break more easily
Looser strings:
- More power and repulsion
- Less control
- Better for recreational play
- More forgiving on mishits
- Longer string lifespan
Tension Measurement
Tension is measured in pounds (lbs). A typical badminton racket is strung between 18-30 lbs.
Standard recreational: 22-24 lbs Competitive intermediate: 24-26 lbs Advanced/professional: 26-30 lbs
The higher the skill level, the higher the typical tension.
How to Choose Your Tension
Beginner: Start at 20-22 lbs. Forgiving and easier to play with.
Intermediate: 24-26 lbs. Good balance of control and power.
Advanced: 26-28 lbs. Maximum control for players with good technique.
Professional: 28-30 lbs. Demands excellent technique but provides maximum performance.
Important: Don’t jump straight to 28 lbs just because pros use it. Build up gradually as your technique improves. Too tight a string for your skill level will frustrate you.
Tension Loss Over Time
Strings lose tension naturally through play. After one week of regular play, tension typically drops 2-3 lbs.
This is why professional players restring before every match. They maintain consistent tension for consistent performance.
For casual players, restringing every 4-6 weeks is reasonable.
Step-by-Step Guide: How to String Your Racket
Step 1: Prepare Your Workspace
What You Need:
- Stringing machine set up and stable
- Racket holder/clamps ready
- All tools organized within reach
- Good lighting
- Clean, flat work surface
Time: 10 minutes
Setup your machine properly. A wobbly machine makes stringing harder and more frustrating.
Step 2: Mount the Racket in the Machine
Process:
- Place racket in the clamps, holding it firmly but not crushing it
- Ensure the frame is perpendicular to the ground
- Position the head of the racket so you can access all grommets easily
- Double-check stability—the racket shouldn’t move during stringing
Common Mistake: Mounting the racket crooked causes uneven tension.
Pro Tip: Use cloth or padding in clamps to protect the racket frame from damage.
Time: 5 minutes
Step 3: Set Your String Tension
Process:
- Determine your target tension (recommend 24 lbs for intermediate)
- Adjust the stringing machine to your chosen tension
- If using a manual machine, mark or remember the tension setting
- Test the mechanism to ensure it’s working properly
For Manual Machines:
- Tension increases as you turn the handle
- You’ll need to maintain consistent hand pressure while tightening
- Takes practice to hit exact tension consistently
For Electronic Machines:
- Enter your desired tension
- The machine holds the tension automatically
- Much easier for beginners
Time: 5 minutes
Step 4: String the Mains (Vertical Strings)
The mains are the vertical strings running from head to handle.
Process:
- Start at the top center of the racket head
- Thread the string through the first grommet
- Pull the string down to the handle and thread through the bottom grommet
- Return the string back up, but DON’T thread through the same top grommet—use the next one over
- Continue alternating sides, moving outward from center
- Each string runs from top to bottom as a single piece
Stringing Pattern:
- String 1: Center top to center bottom
- String 2: One right of center top to one right of center bottom
- String 3: One left of center top to one left of center bottom
- Continue alternating left and right until you reach the edge
The machine maintains tension throughout. As you thread each string, it automatically adjusts tension.
Key Points:
- Keep strings parallel and evenly spaced
- Don’t over-tighten or under-tighten
- Watch for twisted or kinked string
- Keep the racket stable throughout
Time: 20-30 minutes for the mains
Step 5: String the Crosses (Horizontal Strings)
After completing all mains, you’ll string the crosses—the horizontal strings that weave through the mains.
Process:
- Start at the side of the head near the bottom
- Weave the string over and under the mains as you move toward the opposite side
- Thread through the grommet at the opposite side
- Reverse direction and weave back through, going opposite pattern
- Continue until all crosses are complete
Weaving Pattern:
- The crosses literally weave over and under each main
- Tension is maintained as you weave
- Each cross should be at your chosen tension
Key Points:
- Maintain consistent weaving pattern
- Ensure crosses are evenly spaced
- Don’t pull too hard when weaving—let the machine hold tension
- Watch for crossed or twisted crosses
Difficulty Level: The crosses are more challenging than mains for beginners. Don’t get frustrated if your first attempt isn’t perfect. It takes practice.
Time: 25-35 minutes for the crosses
Step 6: Tie Off the String
Once all strings are threaded, you need to secure the end string.
Process:
- The final string needs to be knotted to prevent it from pulling back through
- Common knots: overhand knot or figure-eight knot
- Pull tight but not so tight that you deform the grommet
- Some stringers add a small drop of super glue to the knot for extra security
Common Knots Used:
- Overhand Knot: Simple and effective
- Figure-Eight Knot: More secure
- Double Knot: Extra security for peace of mind
Pro Tip: Test the knot by pulling the string slightly. It shouldn’t slip.
Time: 5-10 minutes
Step 7: Trim Excess String
Cut any excess string sticking out.
Process:
- Use a sharp string cutter
- Cut close to the knot but not so close that you damage it
- The cut should be clean, not frayed
- Remove all excess string and clamps
Be Careful:
- Don’t cut the main string body by accident
- Make clean cuts to prevent fraying
- Clean up all string scraps
Time: 5 minutes
Step 8: Remove from Machine and Test
Now for the moment of truth.
Process:
- Carefully remove the racket from the machine clamps
- Inspect your work—visually check string placement
- Gently flex the racket head to check for obvious issues
- Tap the strings lightly to feel the tension
- If available, use a tension meter to verify actual tension
What to Check:
- Are strings evenly spaced?
- Is tension consistent across the face?
- Are any strings kinked or twisted?
- Does the racket feel balanced?
If Something Seems Wrong:
- Check string spacing
- Look for crossed or twisted strings
- Verify the racket isn’t damaged
- Minor cosmetic issues don’t affect play
Time: 10 minutes
Step 9: Break-In Period
New strings don’t play at full tension immediately.
What Happens:
- Strings settle over the first few hours of play
- Tension drops naturally (this is normal)
- The strings “break in” and feel more comfortable
Recommendation:
- Play gently with the racket for the first 30-60 minutes
- Don’t do intense drills immediately
- Allow strings to settle before competitive play
Time: Ongoing during first few games
Common Mistakes and How to Avoid Them
Mistake 1: Uneven Tension
Problem: Some strings are tighter than others, causing inconsistent play.
Cause: Inconsistent hand pressure on manual machine, or not maintaining proper technique.
Solution: Practice consistent technique. Use an electronic machine if available. Use a tension meter to verify.
Mistake 2: Twisted Strings
Problem: Strings are visibly twisted instead of straight.
Cause: Over-rotating when threading or weaving.
Solution: Handle strings gently. Rotate only as much as needed. Keep tension consistent.
Mistake 3: Broken Strings During Stringing
Problem: String breaks while you’re stringing the racket.
Cause: Too much tension, sharp grommet edges, or defective string.
Solution: Reduce tension slightly. Check grommet condition. Buy quality string.
Mistake 4: Uneven String Spacing
Problem: Strings aren’t evenly distributed across the racket face.
Cause: Poor initial positioning or pulling too hard on strings.
Solution: Take time positioning each string carefully. Don’t rush. Pull strings only as hard as the machine indicates.
Mistake 5: Knot Slips
Problem: The final knot comes undone after a few games.
Cause: Loose knot or inadequate tying technique.
Solution: Make sure knots are tight. Use a double knot. Consider adding a small drop of super glue.
Mistake 6: Damaging the Racket Frame
Problem: Clamps or tools damage the frame during stringing.
Cause: Excessive pressure or no protective padding in clamps.
Solution: Use protective padding in clamps. Be gentle when mounting and removing rackets. Don’t over-tighten clamps.
Mistake 7: Wrong Grommet Threading
Problem: String goes through the same grommet twice instead of progressing around the frame.
Cause: Confusion about the stringing pattern.
Solution: Study the pattern before starting. Reference diagrams. Take it slowly on your first racket.
Your First Racket: What to Expect
Be honest with yourself: your first stringing probably won’t be perfect.
What Usually Goes Wrong:
- Uneven tension across the face
- Slightly uneven string spacing
- Cosmetic imperfections
- Taking longer than expected (2-3 hours for beginners vs 45 minutes for experienced stringers)
What Usually Goes Right:
- The racket still plays (mistakes have to be pretty severe to make a racket unplayable)
- You learn what works and what doesn’t
- Your second and third rackets will be noticeably better
My First Attempt: My first racket took 3 hours. The strings were slightly uneven. But it played fine. My second racket took 90 minutes and looked professional. By the fifth racket, I was down to 45 minutes with excellent results.
Don’t expect perfection. Expect improvement.
Tips for Success
Take Your Time
Rushing causes mistakes. Your first racket might take 2-3 hours. That’s fine. Speed comes with practice.
Reference Materials
Keep a diagram or video handy for reference. Pausing to check is better than making mistakes.
Practice With Old Rackets
If possible, practice on an old racket you don’t care about. Mistakes are less stressful.
Maintain Your Tools
Clean and maintain your machine. Keep strings stored properly. Good tools make the job easier.
Join a Community
Online badminton forums have stringing communities. Ask questions, share progress, and learn from others’ experiences.
Invest in a Tension Meter
A $50 tension meter takes the guesswork out of consistency. After a few rackets, it pays for itself in confidence.
Keep Detailed Notes
Record racket name, string type, tension, and date for each racket you string. This helps you track preferences and problems.
When to Restring
Over time, all strings lose tension and develop wear.
Signs You Need Restringing:
Tension has visibly dropped (strings feel softer) It’s been 4-6 weeks since last stringing (for regular players) Strings show visible wear or fraying The racket feels less responsive than usual You’re preparing for important matches Strings have broken or damaged grommets
Schedule for Different Players:
Casual players (1-2 times/week): Every 8-12 weeks Regular players (3-4 times/week): Every 4-6 weeks Serious competitors: Before every tournament match Professional players: Often multiple times per week
Maintenance Between Restrings
Make your strings last longer with proper care.
Do:
- Wipe strings after play to remove sweat
- Store racket in a cover away from heat and humidity
- Keep the racket dry
- Avoid impacts with walls or floors
Don’t:
- Leave the racket in direct sunlight
- Store in extreme temperatures
- Allow the racket to dry out or stay wet
- Lean the racket against walls carelessly
Cost Comparison: DIY vs Professional
Professional Stringing:
Cost per racket: $15-25 Annual cost (4 restrings): $60-100 No upfront equipment investment Less time required Expert quality guaranteed
DIY Stringing:
Cost per racket: $3-8 Annual cost (4 restrings): $12-32 Upfront investment: $200-300 More time required (initially) Quality improves with practice
Break-even analysis: DIY pays for itself after 10-20 restrings depending on local costs and string choices.
Long-Term (3+ Years):
Professional: $180-300+ for 12+ restrings DIY: Initial $200-300 + $36-96 for materials = $236-396 total
DIY saves money over years, even accounting for tool investment.
Frequently Asked Questions
Q: Can I string a racket by hand without a machine? A: Theoretically yes, but practically no. You need a machine to maintain consistent tension. Hand stringing will result in uneven, unreliable tension.
Q: How long does stringing take? A: First racket: 2-3 hours. After practice: 45 minutes to 1 hour. Experienced stringers: 30-45 minutes.
Q: What tension should I use? A: Start at 24 lbs (intermediate level). Adjust based on feel and skill level. Higher tension requires better technique.
Q: Can I reuse old string? A: No. String loses properties over time and breaks easily when removed. Always use new string for each stringing.
Q: Does string type matter? A: Yes. Different strings affect feel and durability. Experiment to find your preference. Budget nylon works fine for learning.
Q: What if my strings break mid-match? A: You’ll need to restring before your next match. Keep backup rackets to minimize disruption.
Q: Can I use a tennis racket stringing machine? A: Not really. Tennis and badminton machines are different. Badminton requires a specific machine for proper tension control.
Q: How often should casual players restring? A: Every 8-12 weeks is reasonable. When you notice tension loss or wear.
Q: Is professional stringing better quality? A: At professional level, possibly. For most players, properly done DIY stringing is identical to professional stringing.
Q: What’s the most common stringing mistake? A: Uneven tension due to inconsistent technique. This improves dramatically with practice.
Getting Started: Your Action Plan
Week 1: Research and Planning
Research stringing machines and read reviews Decide on manual vs electronic machine Identify what string you want to use Watch tutorial videos from experienced stringers
Week 2: Obtain Equipment
Purchase a manual stringing machine ($150-300) Buy tools (clamps, needle, cutter): $30-50 Purchase stringing material: $20-40 Gather safety equipment and workspace setup
Week 3: Learn and Prepare
Study stringing diagrams and patterns Watch multiple tutorial videos Choose your first racket (ideally an old one to practice) Prepare your workspace
Week 4: First Attempt
String your first racket slowly and carefully Don’t worry about speed or perfection Learn from mistakes Document what you did for reference
Week 5-6: Second and Third Attempts
Restring your second and third rackets Notice improvement and building confidence Adjust technique based on experience Start timing yourself
Month 2-3: Regular Stringing
Restring your rackets on schedule Experiment with different tensions or string types Join online stringing communities Help other players learn