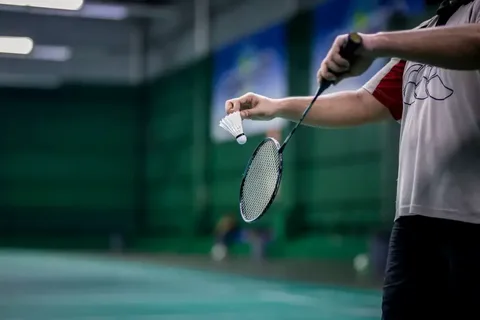


The drop shot is one of the most beautiful weapons in badminton. When executed perfectly, it’s almost impossible to defend. The shuttle barely clears the net, falls sharply, and your opponent scrambles desperately but arrives too late.
I still remember the first time I saw a player use a perfect drop shot in a club match. The deception was so good that I thought he was going for a smash. By the time I realized what was happening, the shuttle had already kissed the floor. I was beaten before I even moved.
That moment changed how I viewed badminton. It wasn’t just about power – it was about finesse, timing, and outsmarting your opponent.
If you’ve been relying only on clears and smashes, you’re missing out on one of the most effective shots in the game. The drop shot will transform your game from predictable to lethal.
In this guide, I’ll break down everything you need to know about the badminton drop shot – from basic technique to advanced deception tactics.
What is a Drop Shot in Badminton?
A drop shot is a soft shot hit from the back of the court that lands just over the net in your opponent’s forecourt. The goal is simple: make your opponent run forward quickly while the shuttle drops steeply, giving them minimal time to react.
Why the drop shot is so effective:
- Forces your opponent to the front court, opening up the back
- Changes the pace of the rally suddenly
- Creates opportunities for net kills
- Tires out your opponent with constant movement
- Works brilliantly when combined with smashes
The drop shot isn’t just a shot – it’s a strategic weapon that controls the tempo of the game.
Types of Drop Shots You Need to Know
There are two main types of drop shots, and mastering both will make you a complete player.
1. Slow Drop Shot (High Arc)
Characteristics:
- Higher trajectory over the net
- Slower shuttle speed
- Steep downward angle after crossing the net
- More time in the air
When to use:
- When you need more time to recover your position
- Against slower opponents
- When you want to set up for the next shot
- In defensive situations
Advantage: Gives you recovery time and is easier to control
Disadvantage: Opponents have slightly more time to reach it
2. Fast Drop Shot (Low Arc)
Characteristics:
- Flatter trajectory
- Faster shuttle speed
- Just clears the net
- Less time for opponent to react
When to use:
- Against tall opponents (harder to reach low shots)
- When opponent is positioned deep
- To catch opponent off-guard
- In attacking situations
Advantage: Harder to defend, puts immediate pressure
Disadvantage: Requires better technique and timing
Both shots have their place. Professional players use slow drops about 60% of the time and fast drops 40% of the time, depending on the game situation.
The Perfect Drop Shot Technique: Step-by-Step
Let me break down the technique into simple, actionable steps. This is the same method I use when coaching beginners.
Step 1: Positioning and Footwork
Get to the shuttle early:
- Move quickly to the rear court
- Position yourself sideways to the net
- Non-racket leg forward (right leg if you’re right-handed)
- Weight on your back foot initially
Common mistake: Many beginners wait until the last moment to move. Get there early and set up properly.
Pro tip: Your positioning for a drop shot should look EXACTLY like your smash position. This is the key to deception.
Step 2: The Grip
Use the forehand grip (same as for overhead clear and smash).
Quick grip check:
- Hold the racket like you’re shaking hands with it
- V-shape formed by thumb and index finger should be on the edge of the handle
- Grip should be relaxed, not tight
- Fingers should have some space between them
Why grip matters: A tight grip kills your wrist action. A relaxed grip allows for the gentle touch needed for drop shots.
Step 3: The Backswing
This is where deception begins.
What to do:
- Raise your racket arm high, elbow bent
- Non-racket arm points toward the shuttle (for balance)
- Rotate your shoulders and hips backward
- Keep your eyes on the shuttle
Critical point: Your backswing should be IDENTICAL to your smash preparation. If your opponent can tell you’re hitting a drop shot from your preparation, you’ve already lost the advantage.
Step 4: The Forward Swing
Here’s where the magic happens.
For a slow drop shot:
- Begin your forward swing just like a smash
- At the last moment, slow down your racket speed
- Contact the shuttle in front of your body
- Use a gentle pushing motion with your wrist
- Angle the racket face slightly downward
For a fast drop shot:
- Faster forward swing (more like a smash)
- Contact the shuttle at the highest point
- Quick but controlled wrist snap
- Flatten the trajectory
- Slice across the shuttle slightly for extra spin
The secret: The slower you swing, the softer the drop. The faster you swing with a controlled wrist, the sharper the drop.
Step 5: Contact Point
Where to hit the shuttle:
- In front of your body
- At full arm extension
- Slightly in front of your non-racket shoulder
- At the highest comfortable point
Racket angle:
- Face angled forward and slightly downward
- More downward angle = steeper drop
- Flatter angle = faster, flatter drop
My experience: I used to hit the shuttle too late (behind my body), and my drops would go long. Moving the contact point forward fixed everything.
Step 6: Follow Through
Proper follow through:
- Let your racket continue forward naturally
- Don’t jerk or stop abruptly
- Racket finishes pointing toward your target
- Weight transfers to your front foot
- Recover quickly to center court
Why it matters: A complete follow-through ensures consistency and control. Stopping your swing suddenly kills your touch and makes shots unpredictable.
Step 7: Recovery
Don’t admire your shot!
After hitting:
- Immediately return to ready position
- Move back to center court using small shuffle steps
- Keep your eyes on your opponent
- Prepare for their return (likely a net shot or lift)
Common mistake: Beginners hit a great drop shot and then stand there watching. Your opponent will punish you with a cross-court net shot.
Deception: The Secret Ingredient
A technically perfect drop shot is good. A deceptive drop shot is unstoppable.
Here’s how to disguise your drop shots:
Technique 1: Identical Preparation
The rule: Your preparation for smash, drop, and clear should look EXACTLY the same until the last possible moment.
How to practice:
- Practice all three shots with the same backswing
- Film yourself and check if you can tell which shot is coming
- If you can tell, your opponent definitely can
Technique 2: Late Wrist Action
The trick: Keep your wrist cocked until the very last moment, then either snap it (smash) or push gently (drop).
Why it works: Your opponent can’t read the shot until it’s too late to react.
Technique 3: Body Language Control
What to avoid:
- Slowing down your swing too early (dead giveaway)
- Changing your body position
- Looking at where you want to drop the shuttle
What to do:
- Maintain full swing speed until contact
- Keep your eyes on the shuttle, not your target
- Use peripheral vision to see court placement
Technique 4: Slice Drop
Advanced technique:
- Contact the shuttle on the side rather than dead center
- Creates sidespin
- Shuttle curves after crossing net
- Even harder to defend
How to do it:
- Angle your racket face slightly
- Brush across the shuttle at contact
- Aim for the outside of the shuttle
Common Drop Shot Mistakes and How to Fix Them
Mistake 1: Telegraph the Shot
Problem: Opponent reads your drop shot and gets there easily
Why it happens: Different preparation than your smash
Fix: Practice identical preparation for all overhead shots. Record yourself and compare.
Mistake 2: Hitting Too Long
Problem: Shuttle lands mid-court or back court instead of near the net
Why it happens: Too much power, wrong contact point, or incorrect angle
Fix:
- Reduce swing speed at contact
- Hit the shuttle further in front
- Angle racket face more downward
- Practice with a target zone near the net
Mistake 3: Hitting Into the Net
Problem: Shuttle doesn’t clear the net
Why it happens: Too steep an angle or hitting shuttle too late
Fix:
- Reduce downward racket angle
- Contact shuttle earlier and higher
- Increase shuttle height over net slightly
Mistake 4: No Deception
Problem: Drop shots are accurate but predictable
Why it happens: Not focusing on disguising the shot
Fix:
- Work on identical preparation
- Practice deception drills
- Mix up your shots more
Mistake 5: Poor Recovery
Problem: You hit a good drop but get caught out of position
Why it happens: Watching the shot instead of moving
Fix:
- Hit and move immediately
- Don’t admire your work
- Anticipate the return
5 Essential Drop Shot Drills
Drill 1: Target Practice
Setup:
- Place targets (cones or towels) in the front corners
- Stand at back court
Exercise:
- Hit 20 drop shots to each corner
- Aim to land within the target zone
- Focus on accuracy over speed
Goal: Improve placement consistency
Progression: Make target zones smaller as you improve
Drill 2: Smash-Drop Alternation
Setup:
- Partner feeds high lifts to your back court
Exercise:
- Alternate: smash, drop, smash, drop
- Use identical preparation for both
- Partner tries to guess which shot is coming
Goal: Develop deception through similar preparation
Success metric: Partner can’t predict your shot
Drill 3: Drop Shot Rally
Setup:
- Both players at back court
Exercise:
- Rally using only drop shots
- Focus on placement, not power
- Try to make opponent stretch for every shot
Goal: Develop touch and control
Duration: 5 minutes per session
Drill 4: Drop and Attack
Setup:
- Partner feeds lifts to you
Exercise:
- Hit drop shot to front court
- Partner lifts it back
- You move forward and kill with net shot or push
Goal: Learn to follow up drop shots effectively
Key learning: Drop shots create attacking opportunities
Drill 5: Multi-Shuttle Drop Shots
Setup:
- Coach or partner with multiple shuttles at net
Exercise:
- Partner feeds rapid consecutive shuttles to back court
- You hit drop shots continuously
- Focus on consistency under pressure
Goal: Build muscle memory and stamina
Reps: 3 sets of 20 drops with 2-minute rest
When to Use the Drop Shot (Game Strategy)
Knowing how to hit a drop shot is one thing. Knowing when to use it is what separates good players from great ones.
Perfect Situations for Drop Shots:
1. After a Series of Clears
- Opponent expects another deep shot
- Already positioned at back court
- Drop catches them off-guard
2. When Opponent is Deep
- They’re behind the baseline
- Maximum distance to cover
- High chance of winning the point
3. Against Slow Movers
- Opponent has poor footwork
- Takes time to reach front court
- Drop shot becomes a killer weapon
4. When You’re in Control
- You have time and good position
- Can execute with proper technique
- Opponent is under pressure
5. To Change Pace
- Rally has become too fast
- Want to disrupt opponent’s rhythm
- Force them to adjust
When NOT to Use Drop Shots:
1. When You’re Off-Balance
- Poor position or late to shuttle
- Will result in weak, predictable drop
- Better to clear and recover
2. Against Very Fast Opponents
- They reach everything
- Drop becomes predictable
- Better to use power shots
3. When You’re Tired
- Technique suffers when fatigued
- Higher chance of errors
- Stick to percentage shots
4. On Crucial Points
- Match point, game point situations
- If you’re not confident
- Better to use your strongest shot
Drop Shot Variations for Advanced Players
Once you’ve mastered the basic drop shot, these variations will add more weapons to your arsenal.
Cross-Court Drop
What it is: Drop shot hit diagonally across the court
Why use it:
- Longer distance for opponent to cover
- Opens up straight return angles
- Harder to anticipate
How to execute:
- Same preparation as straight drop
- Angle racket face toward opposite corner
- Contact shuttle slightly to the side
Reverse Slice Drop
What it is: Drop shot with extreme sidespin
Why use it:
- Shuttle curves away from opponent
- Bounces at awkward angle
- Very difficult to return
How to execute:
- Brush across the back of the shuttle
- Create spin by angling racket
- Requires excellent wrist control
Stick Drop
What it is: Very soft drop with minimal shuttle rotation
Why use it:
- Shuttle dies immediately after landing
- Almost impossible to return aggressively
- Used by professional players
How to execute:
- Extremely gentle contact
- Push rather than hit
- Perfect timing required
Practicing Drop Shots Solo
No partner? No problem. Here are solo drills:
Wall Practice
Setup:
- Stand 2 meters from a wall
- Mark a target area at net height
Exercise:
- Hit gentle drops against the wall
- Focus on soft touch and control
- Catch the return and repeat
Benefits: Develops touch and wrist control
Shadow Practice
Setup:
- No shuttle needed
- Just you and your racket
Exercise:
- Practice the complete drop shot motion
- Focus on footwork, preparation, and follow-through
- Do 50 reps daily
Benefits: Builds muscle memory
String Tension Awareness
Exercise:
- Hold racket and shuttle
- Drop the shuttle from waist height
- Let it bounce on your strings
- Notice the “give” in your strings
Benefits: Develops feel for how much power to use
Combining Drop Shots with Other Shots
The drop shot becomes deadly when combined strategically.
The Smash-Drop Combo
Pattern:
- Smash to push opponent back
- They lift defensively
- Drop shot to front court
- They can’t reach it
Why it works: Opponent is still recovering from the smash
The Drop-Net Kill Combo
Pattern:
- Drop shot to front court
- Opponent lifts
- Move forward for net kill
- Point won
Why it works: Drop brings them forward, lift sets you up to attack
The Clear-Drop Alternation
Pattern:
- Clear to back court
- Opponent clears back
- Drop shot next rally
- Opponent too deep to reach
Why it works: Opponent adjusts to deep game, drop catches them
Physical Conditioning for Better Drop Shots
Drop shots require specific physical attributes:
Wrist Strength
Exercise: Wrist curls with light weights (1-2 kg) Reps: 3 sets of 15, both directions Frequency: 3 times per week
Forearm Flexibility
Exercise: Wrist rotations and stretches Duration: 5 minutes daily Benefit: Better touch and control
Core Stability
Exercise: Planks and rotational exercises Duration: 3 sets of 30 seconds Benefit: Better balance during shot execution
Footwork Speed
Exercise: Ladder drills and sprint intervals Duration: 15 minutes, 3 times per week Benefit: Faster recovery after drop shots
Equipment Considerations
Racket Choice
Best racket characteristics for drop shots:
- Head-light or even balance (better control)
- Flexible shaft (easier to generate touch)
- Medium weight (not too heavy)
Related: How to Choose Your First Badminton Racket: Complete Beginner’s Buying Guide 2025
String Tension
Ideal tension for drop shots:
- Lower tension (20-24 lbs for beginners)
- More “trampoline effect”
- Easier to control soft shots
Higher tension (25+ lbs):
- Better for advanced players
- More control but requires perfect technique
Related: Best Badminton String Tension Guide for More Power and Control
Shuttlecock Choice
Feather shuttlecocks:
- Better for practicing drop shots
- More natural flight
- Better feel and control
Nylon shuttlecocks:
- Can practice with these
- Less expensive for training
- Slightly different flight pattern
Related: Best Shuttlecocks for Training and Professional Matches
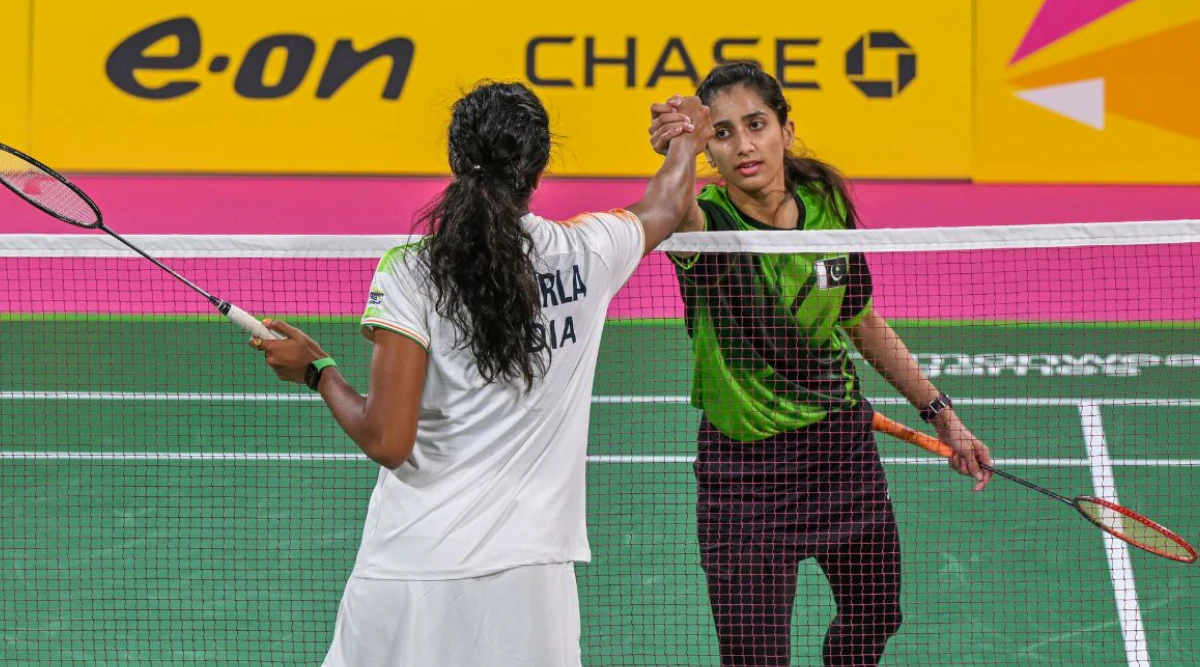
Learning from the Pros
Let’s analyze how professional players use drop shots:
Lee Chong Wei’s Drop Shot
Characteristics:
- Exceptionally deceptive
- Identical preparation to his smash
- Uses cross-court drops frequently
- Perfect timing and placement
What to learn: Deception through preparation
Carolina Marin’s Drop Shot
Characteristics:
- Very fast drops with low trajectory
- Aggressive placement
- Often follows up with net attack
- High-risk, high-reward style
What to learn: Aggressive drop shot execution
Lin Dan’s Drop Shot
Characteristics:
- Strategic timing
- Uses slow drops to control pace
- Excellent at changing rhythm
- Sets up smash opportunities
What to learn: Strategic shot selection
Troubleshooting Guide
Problem: Drop shots keep going into the net
Solutions:
- Contact shuttle higher and more in front
- Reduce downward racket angle
- Add slightly more power
- Check if you’re hitting too late
Problem: Drop shots land too deep (mid-court)
Solutions:
- Reduce swing speed at contact
- Increase downward racket angle
- Hit shuttle earlier in its trajectory
- Use softer wrist action
Problem: No deception – opponent reads every drop
Solutions:
- Film yourself and check preparation
- Make backswing identical to smash
- Don’t slow down too early
- Practice smash-drop alternation drill
Problem: Inconsistent drops
Solutions:
- Focus on fundamentals first
- Practice target drills daily
- Check grip tension (should be relaxed)
- Improve footwork to get better position
Problem: Can’t generate enough spin
Solutions:
- Brush across shuttle at contact
- Angle racket face slightly
- Increase wrist flexibility
- Practice slice motion separately
Progress Tracking
Here’s how to measure your improvement:
Beginner Level (0-3 months)
- Can execute basic drop shot
- 50% accuracy to front court
- Some deception capability
- Mix drops with other shots
Intermediate Level (3-6 months)
- 70% accuracy to specific corners
- Good deception most of the time
- Can execute both slow and fast drops
- Strategic shot selection
Advanced Level (6-12 months)
- 85%+ accuracy
- Excellent deception
- Can add slice and variations
- Instinctive shot selection
- Win points directly with drops
Expert Level (12+ months)
- 90%+ accuracy under pressure
- Masterful deception
- Multiple drop shot variations
- Complete strategic integration
- Opponent constantly fooled
Mental Aspects of the Drop Shot
The drop shot is as much mental as physical.
Confidence
The truth: If you don’t believe in your drop shot, you’ll telegraph it through hesitation.
How to build confidence:
- Practice until it becomes automatic
- Start using it in practice matches
- Celebrate successful drops
- Don’t fear mistakes
Patience
The challenge: Beginners want to use drop shots too often
The wisdom: Use drop shots strategically, not constantly
Best approach: Set up the drop shot with other shots first
Reading Your Opponent
Watch for:
- Their positioning (deep = good drop opportunity)
- Their fatigue level (tired = slower to net)
- Their patterns (do they expect power?)
- Their recovery speed
Adjust accordingly: Use drops more against slower opponents, less against fast movers
Frequently Asked Questions
Q: How long does it take to master the drop shot?
A: Basic competency takes 2-3 months of regular practice. Mastery with good deception can take 6-12 months. Professionals refine it for years.
Q: Should beginners learn drop shots or focus on basics first?
A: Learn basic overhead clear and smash first (2-3 months), then add drop shots. The preparation needs to be similar, so master the power shots first.
Q: Is the drop shot more important in singles or doubles?
A: Important in both, but used differently. Singles: more front-back movement. Doubles: more cross-court and deceptive drops.
Q: Can I practice drop shots without a partner?
A: Yes! Use wall practice, shadow practice, and multi-shuttle solo drills mentioned earlier.
Q: What’s the biggest mistake beginners make?
A: Not focusing on deception. They master the technique but make it obvious they’re hitting a drop. Identical preparation is crucial.
Q: Should I use wrist or arm for power?
A: Neither! Drop shots require gentle touch, not power. Use minimal wrist action and arm speed. Let the racket and strings do the work.
Q: How do I know if my drop shot is too soft or too hard?
A: Too soft = goes into net. Too hard = lands mid-court. Perfect = clears net by 15-30cm and lands in forecourt.
Q: Can tall players hit good drop shots?
A: Absolutely! Height is an advantage because you can hit from a higher point, creating steeper angles. Many tall professional players have excellent drops.
Summary: Your Drop Shot Action Plan
Here’s your roadmap to mastering the drop shot:
Week 1-2: Fundamentals
- Practice basic technique 30 minutes daily
- Focus on soft touch and control
- Target practice drill
- Don’t worry about deception yet
Week 3-4: Consistency
- Increase accuracy to 60%+
- Practice both slow and fast drops
- Start adding footwork
- Begin recovery practice
Week 5-6: Deception
- Work on identical preparation
- Smash-drop alternation drill
- Film yourself and analyze
- Practice in friendly matches
Week 7-8: Strategy
- Learn when to use drops
- Combine with other shots
- Read opponent positioning
- Develop game sense
Week 9-12: Refinement
- Add variations (slice, cross-court)
- Increase accuracy to 80%+
- Use in competitive matches
- Analyze what works
Month 4+: Mastery
- Continuous refinement
- Develop instinctive shot selection
- Work on advanced variations
- Study professional players
The drop shot transformed my game, and it will transform yours too. It’s not just about winning points – it’s about controlling the game, outsmarting your opponent, and experiencing the satisfaction of a perfectly executed shot.
Start with the basics, practice consistently, and don’t get discouraged by mistakes. Every great player has hit thousands of drop shots into the net while learning.
Your opponents won’t know what hit them.
What’s your biggest challenge with drop shots? Share in the comments below, and I’ll help you troubleshoot!
Related Articles:
- How to Improve Your Badminton Smash: Tips for More Power and Accuracy
- How to Master Net Play in Badminton
- Best Defensive Techniques in Badminton
- Badminton Footwork Drills for Beginners: A Step-by-Step Guide
- How to Control Shuttle Direction in Badminton
About This Guide: Written by a competitive badminton player with 7+ years of experience and coaching certification. This guide combines personal experience, professional analysis, and proven training methods.